If you've ever experimented with AI-generated art, you know the thrill of seeing something fresh and unique emerge before your eyes. However, when it comes to creating highly realistic faces in FLUX AI, things can get challenging, particularly if you're a beginner. But don’t worry—I’m here to help! This guide will take you step by step through the process of generating lifelike faces in FLUX AI, covering everything from the fundamentals to mastering the finer details.
Wanna try out FLUX.1 the next generation AI image generator? Look no further, Anakin AI offers a whole Universe of AI tools including FLUX.1, DALL.E 3, Stable Diffusion 3 and so on. So, don’t waste any more time by jumping from website to website. Try Anakin AI now!!
Why Realistic Faces Matter in AI Art
Creating realistic faces is a skill that many artists and digital creators aspire to master. Whether you’re using these portraits for game development, concept art, or even NFT creation, being able to generate realistic faces with FLUX AI can set your projects apart. A well-done face can evoke emotion, tell a story, or bring an entire character to life. But, if things go wrong — like an oddly shaped nose or an eye that’s slightly too high — the results can be unsettling. So, let’s dive into how to avoid these AI pitfalls.
How to Generate Ultra-Realistic Faces in FLUX AI: A Simple, Step-by-Step Guide
If you’ve been dabbling in AI-generated art, chances are you’re excited about creating life-like, ultra-realistic faces. FLUX AI has made that incredibly accessible, but getting the perfect face requires just the right process. Today, I’m going to walk you through a custom step-by-step guide to make this easier, using FLUX AI and Anakin AI. Ready to get started? Let’s go!
Step 1: Get Set Up with Anakin AI
Before we dive into the face creation process, you’ll need to create an account on Anakin AI. It’s super easy and only takes a minute:
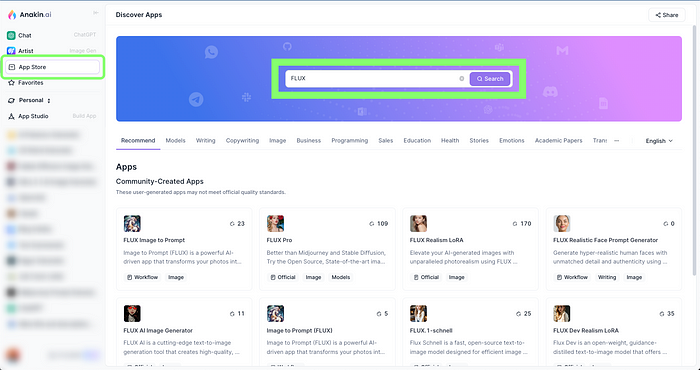
Now that your Anakin AI account is good to go, it’s time to dive into the world of FLUX models. Think of these models as your creative engines — they are designed to generate different types of visuals, including the ultra-realistic faces we’re aiming for.
Personally, I recommend using FLUX Pro — it’s really solid when it comes to generating realistic faces. I’ve also used FLUX LoRA Realism, which is fantastic for adding a lifelike quality to your generated images. You can choose either of these models based on your preference, but for this guide, I’ll focus on FLUX Pro.
Step 3: Understanding the Interface and Prompts
Now that you’ve selected your model, let’s move on to the magic of prompt creation. Once you’re in the FLUX interface, the first thing you’ll notice is the Prompt Section. This is where the magic happens — this is your key to generating exactly what you want.
The trick to creating ultra-realistic faces lies in the quality of the prompt. Your prompt needs to be detailed, clear, and concise. This isn’t just about tossing out a few random words and hoping for the best. The more specific you are, the better the results.
But don’t worry, if crafting the perfect prompt sounds a little daunting, I’ve got just the tool to make it easier!
Step 4: Using the FLUX Realistic Face Prompt Generator
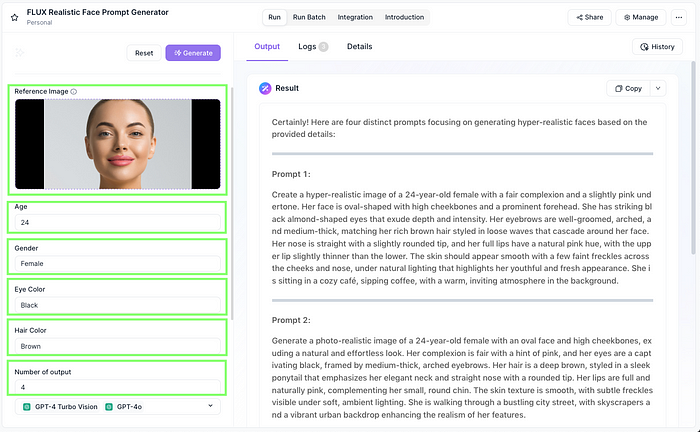
To help you get the perfect prompt, we’ll use the FLUX Realistic Face Prompt Generator. This tool takes the guesswork out of creating those detailed prompts.
Here’s how to use it:
Input Details: You’ll need to provide the generator with some basic details, like:
Reference Image: If you have a specific look in mind or want the face to resemble someone, you can upload a reference image.
Age: Specify the age range (e.g., young adult, middle-aged, etc.).
Gender: Male, female, or non-binary — whatever fits your vision.
Hair Color: Pick from a range of shades, or let the AI decide.
Eye Color: Do you want striking blue eyes or mysterious brown ones?
Nationality: If you have a specific ethnicity or nationality in mind, include that too.
Additional Requirements: Want glasses, freckles, or specific facial features? Add them here!
Generate the Prompt: Once you’ve filled in the details, hit Generate and voilà — you’ll have a fully detailed prompt ready to use.
This step is essential because a good prompt makes all the difference when trying to create realistic faces in FLUX AI. So don’t rush it; take your time and really think about the details you want to include.
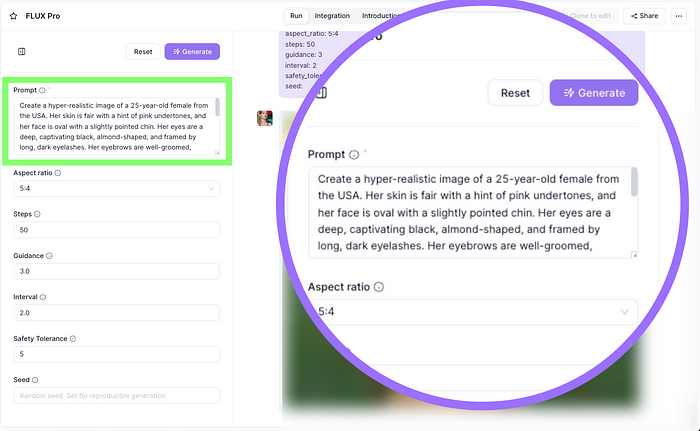
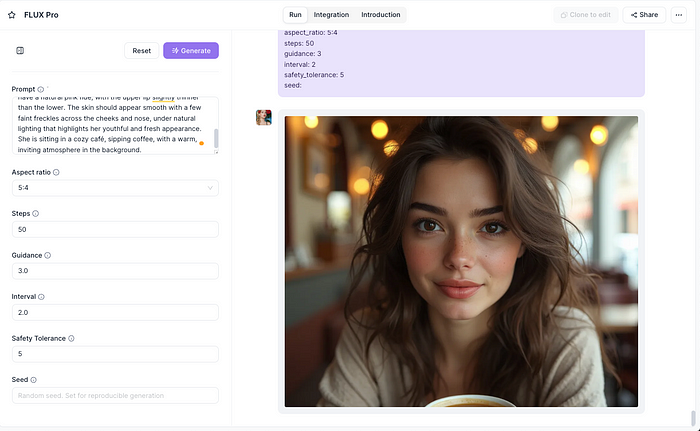
Step 5: Applying the Prompt in FLUX Pro
With your detailed prompt in hand, it’s time to bring it into FLUX Pro and let the AI work its magic.
Go back to the FLUX Pro model you opened earlier and locate the prompt section.
Paste your prompt into the box. Trust me, this detailed prompt is the key to getting those life-like results you’ve been dreaming of.
Now, you’ll need to tweak one important setting before hitting “Generate”:
Aspect Ratio: For facial images, the general recommendation is to use a vertical ratio. This gives the face a natural, portrait-style layout, which is perfect for realistic portraits.
Step 6: Fine-Tuning the Results (Optional)
Before you hit Generate, there are a few advanced settings available, but for most users — especially beginners — you don’t need to worry about tweaking these too much. FLUX Pro is pretty solid out of the box, and it’ll deliver great results without much fiddling. However, if you’re the curious type, feel free to explore those advanced options.
Once you’re ready, hit Generate and wait for the magic to happen. Within moments, FLUX AI will create your ultra-realistic face, complete with all the details you provided in the prompt.
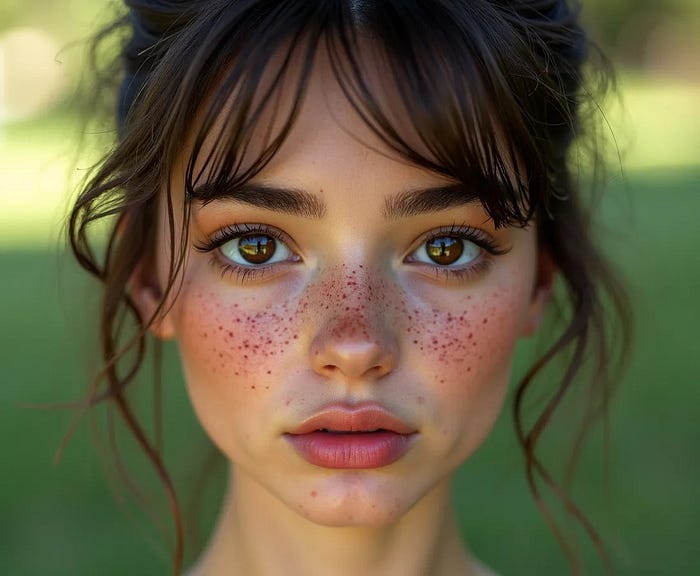
Final Output Images
What to Do Next with Your FLUX Creations?
You’ve got your ultra-realistic face, so what can you do with it? The possibilities are endless! Here are a few ideas:
Character Design: Whether you’re working on a video game, graphic novel, or animation, your generated face can serve as the base for a character.
Portrait Art: Want to create stunning AI-generated portrait art? Frame it, post it, or even sell it as part of an NFT collection.
Marketing Visuals: If you’re in the business world, realistic faces can be used for highly engaging ads, website visuals, and more.
Final Thoughts
And there you have it! In just a few simple steps, you can generate ultra-realistic faces using FLUX AI, and the process couldn’t be more straightforward thanks to the power of Anakin AI. The real key here is in the prompt creation — the more detailed and specific you can be, the more incredible your results will be.
So, whether you’re creating a face for a project or just experimenting with FLUX AI face generation, I hope you now feel confident in getting lifelike, striking portraits with ease.